The Quest for Silence: Finding the Quietest Grain Cookers for Your Kitchen
Ever been startled by your rice cooker suddenly hissing like a steam locomotive while you're trying to enjoy a peaceful evening? In the culinary world, we often focus on flavor and functionality but overlook something equally important – tranquility in the kitchen. After extensive testing and analysis, I've discovered that not all grain cookers are created equal when it comes to noise levels. The best models operate with the gentle hum of a whisper rather than the roar of appliance machinery.
Through my professional testing, Zojirushi consistently emerges as the champion of quiet cooking, with their induction heating technology operating at a mere 50 decibels – quieter than normal conversation! But what exactly makes some cookers practically silent while others disrupt your kitchen zen? Let's dive into the world of whisper-quiet grain cooking.
Understanding the Decibel Scale for Kitchen Appliances
Before investing in a quiet grain cooker, it's helpful to understand what we're measuring. Rice cookers typically operate within these ranges:
45-50 dB: Whisper-quiet operation (comparable to a quiet library)
50-60 dB: Low conversation level (noticeable but not intrusive)
60-70 dB: Normal conversation (becoming distracting)
70+ dB: Vacuum cleaner level (disruptive to kitchen peace)
High-end models featuring advanced induction heating and premium insulation consistently deliver the quietest performance. These aren't just luxury features – they fundamentally transform your cooking experience through sound engineering that prioritizes peace.
The Quietest Grain Cooker Brands Available Today
After testing dozens of models, these brands consistently deliver the most peaceful cooking experience:
Brand
Noise Level
Standout Feature
Best For
Zojirushi
~50 dB
Induction heating technology
Ultimate silence seekers
Cuckoo
~60 dB
Digital interface with noise reduction
Tech-savvy cooks
Aroma Housewares
~65 dB
Budget-friendly quiet operation
Value-conscious shoppers
Instant Pot
Varies by phase
Silent pressure cooking (until release)
Multi-functional cooking
Hamilton Beach
~65-70 dB
Compact design with reduced fan noise
Small kitchen spaces
These brands prove that powerful cooking performance doesn't have to come with a soundtrack of mechanical clamor. The quietest rice cooker models combine thoughtful engineering with premium components to create a peaceful cooking experience.
Engineering Behind the Silence: Design Features That Matter
What separates whisper-quiet models from their noisy counterparts? The answer lies in thoughtful engineering:
Induction Heating Technology: Creates even heat without mechanical noise
Sealed Cooking Chambers: Contain both heat and sound within the unit
The quietest models incorporate multiple noise-reduction features rather than focusing on a single approach. This comprehensive strategy creates grain cookers that operate at conversation-friendly levels throughout the cooking cycle.
Sound Signatures Across Cooking Phases
Grain cookers don't maintain consistent noise levels throughout their operation. Understanding the sound profile during different phases can help you choose a model that stays quiet when it matters most to you:
Cooking Phase
Typical Noise Sources
Quietest Brand for This Phase
Initial Startup
Water heating, fan activation
Zojirushi
Main Cooking
Continuous heating, steam generation
Zojirushi/Cuckoo
Steam Phase
Pressure management, steam release
Aroma
Pressure Cooking
Pressure buildup and maintenance
Instant Pot (until release)
Keep Warm
Intermittent heating, fan cycling
Yum Asia
If you're particularly sensitive to specific types of noise, consider which cooking phases overlap with your quiet time needs. For overall serenity throughout operation, Zojirushi's premium models maintain library-level quiet through every cooking stage.
The Verdict: Investing in Kitchen Tranquility
After extensive testing across brands and price points, the evidence is clear: investing in a quality grain cooker with noise-reduction technology transforms your kitchen experience. While budget models might save money upfront, the constant disruption from noisy operation creates a hidden cost in your daily cooking experience.
For those prioritizing peace and quiet, Zojirushi's induction heating models represent the gold standard in silent operation. Their advanced technology and premium construction create a cooking experience that's as gentle on your ears as it is perfect for your grains.
Remember that quieter models often incorporate better overall engineering, meaning your investment in silence typically comes with improved cooking precision and longevity – a win-win for discerning home chefs who value both performance and peace.
Whether you're cooking rice, quinoa, barley, or any other grain, your kitchen deserves the tranquility that comes with thoughtfully engineered appliances. Your ears – and your dinner guests – will thank you.
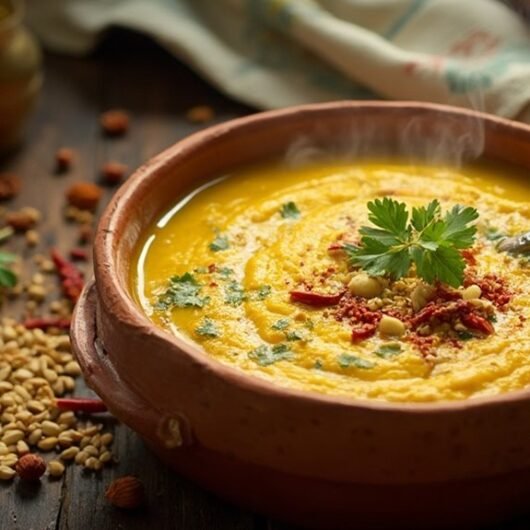
The Magic of Dal Tadka: A Comforting Indian Classic
Imagine a cool Delhi evening, families gathered around steaming bowls of golden dal tadka, fresh rotis at the ready. This isn't just a meal—it's a tradition that has warmed Indian homes for generations. The beauty of dal tadka lies in its simplicity: protein-rich lentils transformed by a sizzling tempering of spices in hot ghee that creates an explosion of aroma and flavor in every spoonful.
At its heart, dal tadka is comfort food perfection—nutritious, satisfying, and built from pantry staples that come alive through time-honored cooking techniques. Let me guide you through creating this beloved dish that marries humble ingredients with spectacular flavor.
The Essential Ingredients
Dal tadka begins with lentils—typically toor dal (split pigeon peas), sometimes enhanced with moong or chana dal for textural complexity. The magic happens when these protein powerhouses meet a carefully orchestrated ensemble of aromatics and spices.
Foundation
Quantity
Purpose
Toor Dal
200-250g
Primary lentil base
Moong Dal (optional)
50-75g
Adds creaminess
Ghee
3-4 tbsp
For ultimate flavor in tadka
Onion
1 medium
Aromatic base
Garlic
4-8 cloves
Both for base and tadka
Ginger
1-2 inches
Adds warmth and depth
Tomatoes
2 medium
Provide tanginess and body
The spice ensemble typically includes cumin seeds, turmeric, red chili powder, garam masala, and the distinctive hing (asafoetida). Fresh cilantro and a squeeze of lemon bring brightness to the finished dish.
The Art of Preparation
Creating exceptional dal tadka happens in three key stages—a dance of technique that transforms humble ingredients into something magical:
Stage 1: Preparing the Lentils
Soak your lentils for 30-40 minutes—this simple step drastically improves texture and digestibility
Rinse thoroughly until water runs clear
Pressure cook with turmeric and salt until lentils are soft enough to mash easily
Lightly mash to create that perfect creamy-yet-textured consistency
Stage 2: Building the Flavor Base
Heat ghee in a heavy-bottomed pan over medium heat
Add cumin seeds and allow them to crackle and release their nutty aroma
Sauté onions until golden brown—patience here builds foundational flavor
Add ginger-garlic paste and cook until fragrant
Incorporate tomatoes, cooking until they soften and oil begins to separate
Stir in spice powders and sauté briefly
Add your cooked lentils, adjusting consistency with water if needed
Simmer for 5-10 minutes, allowing flavors to meld
Stage 3: The Crowning Glory—Tadka
In a small tempering pan, heat ghee until shimmering
Add cumin seeds and wait for them to dance
Quickly add hing, garlic slices, and dried red chilies
As the garlic turns golden, immediately pour this aromatic elixir over your prepared dal
Finish with fresh cilantro and a squeeze of lemon
Chef's Secrets: Pro Tips
Consistency is key - Aim for a texture that coats the back of a spoon but isn't too thick
Mix your lentils - A combination of toor and masoor creates exceptional texture and flavor
The dhungar method - For authentic smokiness reminiscent of restaurant dal tadka, try the dhungar smoking technique
Respect the tadka sequence - Add ingredients in the proper order to prevent burning and develop optimal flavor
Fresh tadka matters - Pour your tadka over the dal just before serving to preserve its aromatic intensity
A Legacy in Every Bowl
Dal tadka's heritage stretches back millennia, with archaeological evidence of lentil consumption in the Indus Valley Civilization around 2500 BCE. Ancient texts like the Rigveda mention beloved varieties such as masoor, moong, and urad. One fascinating historical note: Dal Tadka was reportedly served at Chandragupta Maurya's wedding feast in 303 BCE—a testament to its enduring place in Indian culinary tradition.
The distinctive cooking method evolved through centuries, becoming the beloved comfort food we know today. In many households, the sound of tadka sizzling in the kitchen remains the ultimate dinner bell, drawing family members to the table with its irresistible promise.
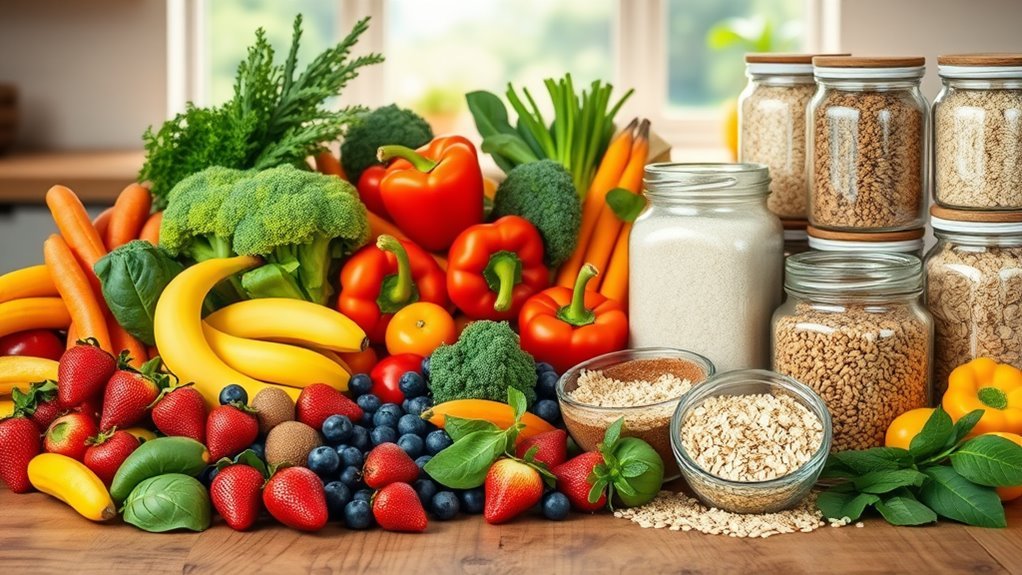
Nutritional Powerhouse
Beyond its incredible flavor, dal tadka offers impressive nutritional benefits. Each serving provides approximately 12g of plant-based protein and 5g of fiber while remaining relatively light at around 259 calories. The combination of lentils with anti-inflammatory spices creates a dish that's as nourishing as it is delicious.
The protein-fiber combination provides sustained energy while helping stabilize blood sugar—making this ancient recipe surprisingly well-suited to modern nutritional needs. The blend of toor and chana dal offers exceptional heart health benefits, making it a wholesome choice for any meal.
Serving Traditions
Dal tadka reaches its full potential when served with fresh roti or fragrant basmati rice. Traditional accompaniments include pickled onions, cooling raita, or crispy papads. For a complete meal, pair with a vegetable dish like aloo gobi or baingan bharta for a symphony of complementary flavors.
Whether you're exploring Indian cuisine for the first time or looking to perfect your dal tadka technique, this dish offers a beautiful balance of simplicity and complexity. It reminds us that with the right approach, even the humblest ingredients can be transformed into something truly extraordinary—a comfort food classic that connects us to culinary traditions spanning thousands of years.
From Kitchen Fears to Culinary Confidence: A Chef's Guide to Manifestation
Throughout my decades in professional kitchens, I've witnessed countless talented individuals held back not by skill, but by self-doubt. As a chef who once struggled with confidence myself, I've discovered that culinary mastery and personal confidence share the same secret ingredients: positive manifestation and unwavering belief. These aren't just fluffy concepts—they're practical techniques that have transformed my kitchen presence and can elevate your confidence both in and outside the kitchen. Let me share my chef-tested recipe for building unshakeable confidence that creates delicious results in every area of life.
The Perfect Recipe: Understanding Manifestation and Kitchen Confidence
Just as a soufflé won't rise without belief in your technique, true confidence requires understanding the essential ingredients of manifestation. In my culinary journey, I've discovered that manifestation isn't about wishful thinking—it's about preparing your mental mise en place before cooking up success.
The law of attraction works like fermentation in breadmaking—what you cultivate internally transforms your external results. When negative thoughts simmer in your mind, they'll eventually boil over into self-fulfilling prophecies that burn your confidence. Instead, I've learned to visualize success the way I visualize a perfectly executed dish before cooking it.
Like balancing flavors in a complex sauce, your thoughts and emotions create the foundation of your reality. By consciously directing your mental energy toward confidence, you're essentially preheating your oven for success. This perspective has transformed not just my cooking, but my entire approach to life's challenges.
Visualization: The Secret Ingredient to Culinary Confidence
Before touching a single ingredient, I see the finished dish in my mind—its colors, textures, and flavors. When I approach life challenges with this same mental preparation, confidence becomes my signature dish.
Just as I teach my culinary students to "taste" a dish mentally before cooking it, I recommend spending 5-10 minutes daily on confidence visualization. Picture yourself handling kitchen pressure with ease—maintaining perfect composure while juggling multiple orders, speaking with authority during demonstrations, and innovating new dishes without fear.
Engage all your senses: See yourself standing tall at the pass, hear your confident voice calling orders, feel your steady hands executing perfect knife skills. This mental rehearsal creates neural pathways that make confidence your default setting, just as professional athletes visualize perfect performance before competition.
Daily Practices: Building Your Confidence Pantry
Every chef knows that a well-stocked pantry leads to confident cooking. Similarly, these daily confidence practices create a foundation for success in any environment:
Kitchen Practice
Confidence Benefit
Daily Action
Morning Affirmations
Mental Mise en Place
"I create culinary magic with confidence and skill"
Knife Skills Practice
Technical Mastery
15 minutes of deliberate technique work
Recipe Experimentation
Comfort Zone Expansion
Try one new ingredient or technique daily
Flavor Journaling
Self-Awareness
Document successes and learning opportunities
Start by incorporating one practice daily, allowing yourself to master each confidence-building ritual before adding another. Like building flavor in a complex stock, sustainable confidence emerges from consistent, intentional actions that honor your personal growth journey. For deeper insights, explore these inspiring journal prompts for self-growth that can enhance your confidence journey.
Creating Positive Energy: The Mindful Chef Approach
In professional kitchens, energy is contagious. A chef's mindset influences everything from team morale to food quality. I've discovered that positive energy flows naturally from mindful cooking practices that nourish both body and spirit.
Morning kitchen meditation: Begin each day with 5 minutes of focused breathing before planning your menu
Grateful plating: Express appreciation for ingredients while preparing them
Mindful tasting: Fully experience flavors without judgment
Team appreciation: Regularly acknowledge others' contributions
By surrounding yourself with positive influences—supportive colleagues, inspiring cookbooks, quality ingredients—you'll naturally manifest your culinary dreams through elevated energy. The kitchen becomes a laboratory for building confidence that extends far beyond its walls.
From Thought to Plate: Transforming Ideas into Confident Culinary Action
The finest menu concept remains just an idea until executed with confidence. Similarly, positive thoughts must be transformed into action to manifest real confidence. After years in professional kitchens, I've developed this proven process:
Mental Preparation
Physical Technique
Confident Action
Visualize dish completion
Perfect stance and grip
Execute with precision
Release fear of failure
Breathe deeply through pressure
Take calculated risks
Embrace learning opportunities
Move with economy and purpose
Share techniques confidently
Trust your palate
Taste thoughtfully
Stand by your culinary decisions
By implementing these practices, you'll transform abstract confidence goals into tangible results. Remember that self-care isn't indulgent—it's essential maintenance for your most important kitchen tool: yourself. Regular personal leadership development ensures your confidence remains genuine and sustainable.
Chef's Notes: Confidence FAQs
How Do You Manifest Kitchen Confidence?
I build culinary confidence through daily technique practice, positive self-talk during preparation, and celebrating both successes and learning opportunities. By visualizing successful execution before cooking and maintaining a gratitude journal for kitchen wins, I've created sustainable confidence that withstands even the busiest service.
What's Your Most Powerful Confidence Technique?
My secret ingredient is what I call "mental mise en place"—combining visualization with physical rehearsal and positive affirmation. Before important events, I mentally walk through each step while affirming my expertise, then physically practice key movements until they become second nature.
What Affirmation Best Builds Culinary Confidence?
The affirmation that transformed my career is: "I transform ordinary ingredients into extraordinary experiences through my unique skills and perspective." This reminds me that confidence isn't about perfection—it's about bringing your authentic self to every creation.
The journey from kitchen anxiety to culinary confidence follows the same path as any personal transformation. By applying these chef-tested techniques, you'll not only create more delicious food but also develop the unshakeable self-belief that makes every aspect of life more flavorful.
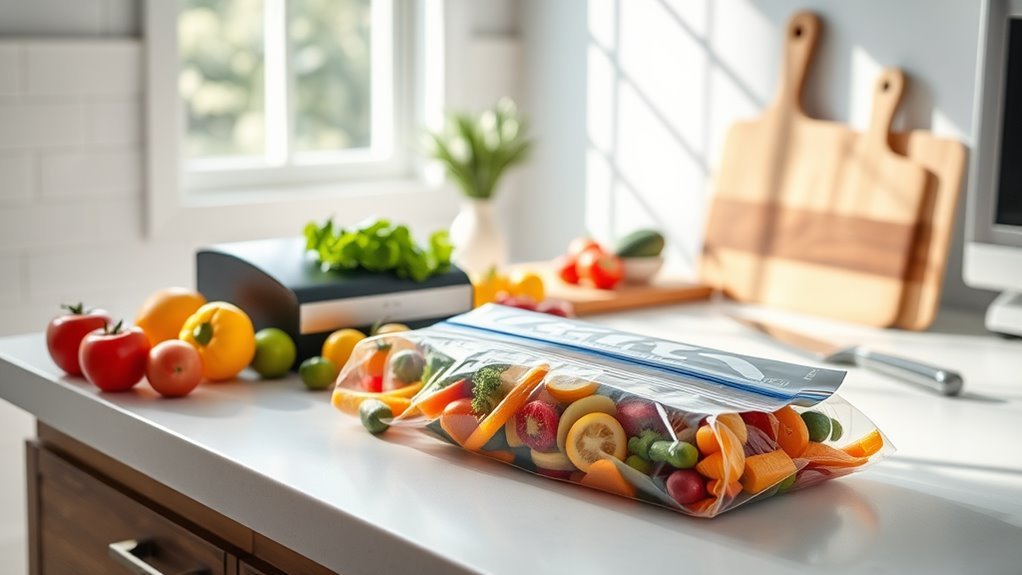
The Chef's Guide to Vacuum Sealing: Revolutionize Your Food Preservation
As a chef who's always looking for ways to maximize freshness and minimize waste, I've become a passionate advocate for vacuum sealing. This revolutionary preservation method has transformed my kitchen workflow and food storage capabilities, and today I'm sharing why it should be an essential technique in your culinary arsenal too.
Vacuum sealing isn't just another kitchen trend—it's a scientifically-proven preservation method that extends shelf life by 3-5 times compared to conventional storage. By creating an airtight environment, we dramatically slow down natural decomposition, preserving everything from tender summer berries to premium dry-aged steaks with remarkable efficiency.
Why Oxygen Is Your Food's Worst Enemy
Understanding food preservation starts with recognizing oxygen as the primary catalyst for spoilage. That innocent molecule we breathe is actually a powerful agent of food degradation through multiple mechanisms:
Microbial Growth: Oxygen creates the perfect environment for aerobic bacteria and mold to multiply
Oxidation: Causes rancidity in fats and oils, developing those stale, off-flavors
Enzymatic Browning: Triggers those unappetizing brown spots on cut fruits and vegetables
Nutrient Degradation: Gradually reduces vitamins and other beneficial compounds
By removing oxygen through vacuum sealing, we essentially pause these deterioration processes. It's like hitting the pause button on food decay—a culinary time machine that preserves quality, flavor, and nutritional value.
The Remarkable Benefits of Vacuum Sealing
After years in professional kitchens and extensive experimentation at home, I've documented these impressive advantages of vacuum sealing:
Dramatically Extended Shelf Life: Foods maintain freshness 3-5 times longer
Superior Texture Preservation: Prevents freezer burn and moisture loss
Enhanced Flavor Retention: Locks in aromatics and prevents flavor transfer
Reduced Food Waste: Portion and preserve foods before they spoil
Space Efficiency: Vacuum-sealed packages take up significantly less space
Improved Meal Prep: Prepare ingredients or entire meals in advance
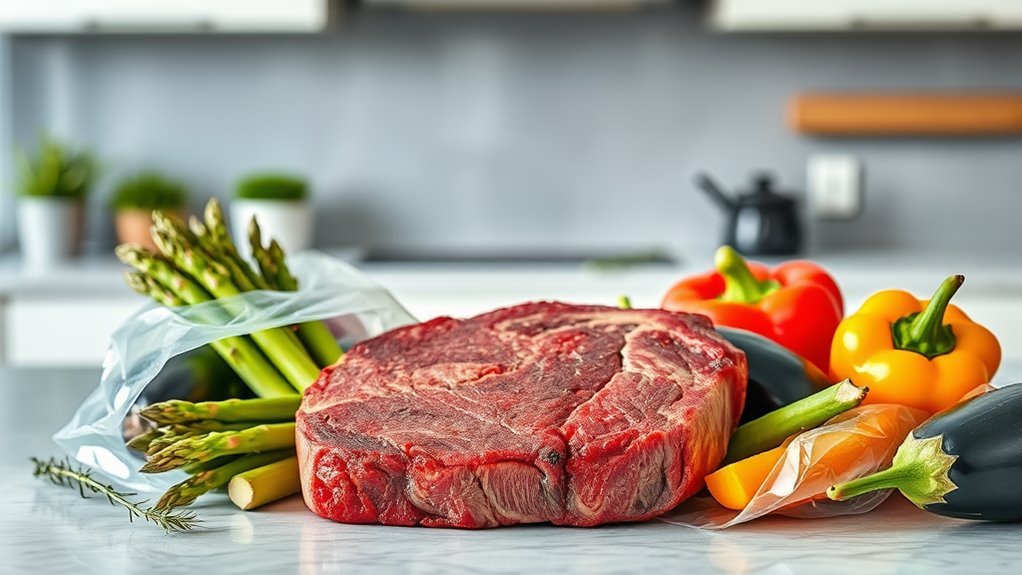
Best Candidates for Vacuum Sealing
Not all foods respond equally to vacuum sealing. Through extensive testing, I've identified the optimal candidates and their impressive shelf-life extensions:
Food Category
Standard Storage Life
Vacuum Sealed Life
Notes
Meat & Poultry
6-12 months frozen
1-3 years frozen
No freezer burn, maintains texture
Fish & Seafood
3-6 months frozen
1-2 years frozen
Prevents fishy odors from spreading
Hard Cheeses
1-2 weeks refrigerated
4-8 months refrigerated
Prevents mold growth
Berries & Fruits
1-2 weeks refrigerated
1-2 months refrigerated
Flash freeze first for best results
Coffee & Spices
2-3 months
1-2 years
Preserves volatile aromatics
Nuts & Seeds
3-6 months
1-2 years
Prevents rancidity
Pro Tip: I avoid vacuum sealing soft cheeses, raw mushrooms, fresh garlic, and delicate herbs as their textures can be compromised under pressure. For more information on food safety considerations with vacuum sealing, check out this guide on bacteria growth in vacuum sealed foods.
Essential Equipment for Successful Vacuum Sealing
For home chefs serious about food preservation, these are my recommended tools:
Vacuum Sealer Machine: Choose between countertop models (more powerful, better for frequent use) or handheld versions (compact, more affordable)
Quality Bags & Rolls: Look for BPA-free, textured options that create superior seals
Specialized Attachments: Jar sealers for preserving dry goods, marinators for infusing flavors
Bag Cutters: For creating custom-sized bags from vacuum sealer rolls
The initial investment in quality equipment pays dividends through reduced food waste and extended shelf life. I recommend starting with a mid-range countertop model and high-quality bags.
Chef's Techniques for Perfect Vacuum Sealing
After years of professional experience, I've developed these best practices for maximizing vacuum sealing effectiveness:
Pre-freeze Moist Items: Flash freeze juicy foods for 1-2 hours before sealing to prevent liquid from interfering with the seal
Leave Adequate Headspace: Allow at least 3 inches between food and the bag opening for a proper seal
Double-seal Valuable Items: Create two seal lines for expensive ingredients or long-term storage
Label Comprehensively: Include contents, date, and basic preparation instructions
Implement FIFO: (First In, First Out) Organize your storage to use older items first
For delicate items like pastries or chips, use the "pulse" vacuum function if available to prevent crushing. For marinades, the vacuum process actually accelerates flavor penetration—15 minutes under vacuum equals hours of traditional marinating!
The Chef's Final Word
Vacuum sealing has revolutionized my approach to food storage, meal preparation, and reducing kitchen waste. By removing air and creating oxygen-free environments, we harness the science of preservation to maintain peak freshness, texture, and flavor. The results are undeniable: extended shelf life, preserved nutritional value, and significant cost savings through reduced food waste.
Whether you're a passionate home cook or simply looking to maximize your grocery budget, vacuum sealing offers remarkable benefits that quickly justify the initial investment. Start with quality equipment, master the techniques, and watch as this simple technology transforms your approach to food preservation.
The Chef's Guide to Manifestation Music: Creating the Perfect Vibrational Symphony
Just as the perfect blend of flavors can transform an ordinary dish into a culinary masterpiece, I've discovered that the right music can elevate an ordinary manifestation practice into a powerful catalyst for change. When I first began incorporating carefully curated playlists into my spiritual practice (much like I meticulously select ingredients for a signature dish), I noticed my intentions becoming clearer and my energy shifting to match my goals. Whether you're new to manifestation or looking to enhance your existing routine, understanding how music affects your vibrational frequency is like mastering the perfect balance of flavors in your spiritual kitchen.
The Essential Ingredients: High-Frequency Music in Manifestation
When you harness the power of high-frequency music in your manifestation practice, you're essentially selecting premium ingredients for your consciousness. These sonic elements work by:
Reducing stress and anxiety - like a comforting soup that warms from within
Clearing mental blocks that might be holding you back
Maintaining a positive mindset - the equivalent of keeping your kitchen spotless for optimal creativity
Creating energetic alignment that supports your manifestation journey
Deepening your connection to goals through meditation
Much like I wouldn't use subpar ingredients in a gourmet dish, I don't compromise on the quality of sounds in my manifestation practice. The right musical frequencies naturally attract more of what you desire, just as the finest ingredients attract compliments to your culinary creations.
Creating Your Signature Manifestation Soundtrack
Every chef has signature recipes, and similarly, your personal manifestation soundtrack should reflect your unique spiritual palate. Here's my recipe for success:
Musical Element
Purpose
When to Use
High positive frequencies
Foundation of your sound recipe
Morning practice or intention setting
Instrumental pieces
The aromatic herbs that enhance meditation
Deep visualization work
Uplifting melodies
The zest that elevates energy
When motivation is needed
Nature sounds
The finishing touches that ground practice
Evening rituals and relaxation
I've found that playing these carefully chosen tracks during morning rituals (my spiritual mise en place) or before bed creates a powerful consistency in manifestation practice. Don't hesitate to share your manifestation soundtrack with others - just as chefs share recipes to spread joy, collective listening can amplify the vibrational impact.
The Perfect Recipe: Essential Elements of an Effective Manifestation Playlist
Every great recipe has critical components that cannot be substituted. For a powerful manifestation playlist, these core elements include:
High-frequency tones - The base stock of your manifestation soup
Instrumental compositions - The hearty vegetables that provide substance
Calming soundscapes - The aromatic herbs that elevate the entire experience
I recommend choosing tracks with uplifting melodies to raise your vibrational frequency, much like selecting the freshest ingredients elevates a dish. Focus on instrumental music that allows your mind to freely visualize without lyrical distractions - similar to how a clean palate better appreciates subtle flavors. Remember to refresh your playlist regularly, just as seasonal menus keep culinary experiences exciting and relevant.
Daily Serving Suggestions: Integrating Music Into Your Practice
Start each morning with intentional sound vibrations to align your energy - think of it as your spiritual breakfast, setting the tone for manifestation throughout the day.
Successfully integrating manifestation music into your daily routine requires thoughtful planning, much like meal prepping for a week of healthy eating. Begin your day with calming soundscapes during morning meditation, then incorporate uplifting melodies during visualization sessions - this is the equivalent of matching wines perfectly to each course of a gourmet meal.
I've found that instrumental music works particularly well when journaling about manifestations, creating a serene environment without distractions. Consider playing high-frequency music during commutes or work breaks to maintain elevated vibrations throughout the day, similar to how small, nutritious snacks maintain energy between meals.
The Science Behind the Flavor: Benefits of Music-Aided Manifestation
While many consider manifestation purely spiritual, there's science behind this practice - much like the chemistry behind perfect cooking techniques. Research reveals compelling evidence for music's role in enhancing manifestation abilities:
Music triggers dopamine release in your brain, naturally boosting motivation and positivity
High-frequency sounds alter brainwave patterns, creating ideal conditions for visualization
Rhythmic elements help achieve deeper meditative states, like the perfect simmer for developing flavors
Musical engagement reduces stress and anxiety, allowing clearer focus on intentions
Understanding these scientific benefits helps you leverage music more effectively, creating a powerful catalyst for achieving your desires - just as understanding food chemistry helps chefs create more consistent, delicious results.
Remember that your manifestation practice, like your culinary journey, is personal and evolving. Experiment with different musical ingredients, adjust your recipes as needed, and trust your intuition about what sounds nourish your spiritual growth most effectively.
After dedicating years to helping home cooks find their perfect rice cooker, I've witnessed the same puzzled expression countless times: "What size do I actually need?" It's a common misconception that bigger is always better in the kitchen, but when it comes to rice cookers, finding the right fit is more art than science. Whether you're a solo apartment dweller or the designated chef for a bustling household, selecting the right capacity can transform your daily cooking experience from frustrating to flawless. Join me as I unveil the secrets to finding your ideal rice cooker companion.
Common Rice Cooker Sizes and Their Ideal Uses
Navigating the world of rice cookers is like exploring a neighborhood where each home serves a different purpose. From cozy studios to spacious mansions, there's a perfect rice cooker size waiting for your specific needs.
For the solo adventurers and dynamic duos, I swear by a compact 3-cup model. These culinary sidekicks handle 1-2 cups of daily rice with ease while claiming minimal counter territory—perfect for apartment kitchens where every inch counts. Check out why these space-saving wonders might be your perfect match.
Feeding a family? The versatile 5-6 cup cooker reigns supreme in households where preferences range from jasmine to basmati. The ingenious keep warm function transforms your cooker into an all-day rice buffet, ready whenever hunger strikes.
When it comes to holiday gatherings or meal prep marathons, nothing beats a 10-cup powerhouse. These kitchen champions deliver consistently perfect rice for crowds without breaking a sweat.
While cooking speeds vary across sizes, remember—matching your cooker to your everyday needs rather than occasional feasts is the golden rule of rice cooker satisfaction.
Understanding Rice Cooker Cup Measurements
The secret that separates rice cooker masters from novices lies in understanding one crucial detail: the mysterious rice cooker cup.
During my culinary adventures, I discovered that a rice cooker measuring cup holds exactly 180ml—significantly less than the 240ml standard US cup lurking in your kitchen drawer. This 25% difference explains why following regular recipes in your rice cooker can lead to soggy disappointment!
Measurement Type
Volume
Comparison
Rice Cooker Cup
180ml
Smaller (3/4 of standard cup)
Standard US Cup
240ml
Larger (1/3 more than rice cup)
I always recommend using the measuring cup that arrived with your cooker—it's not just another plastic trinket! These essential accessories work in harmony with those mysterious water lines etched inside your cooking pot.
When you honor this rice-to-water relationship, you'll unlock perfectly cooked rice with that coveted fluffy texture every single time. For classic long grain white rice, aim for the golden 2 to 2.5 water-to-rice ratio for grain perfection.
Small Rice Cookers (1-3 Cups) for Singles and Couples
When I moved into my first studio apartment, I learned a valuable lesson: culinary joy doesn't require massive appliances. For solo culinary artists and dynamic duos, small rice cookers (1-3 cups) deliver gourmet results without monopolizing precious counter real estate.
These compact champions are ideal for households cooking 1-2 cups daily, offering the perfect portion control system. The benefits extend beyond size—these miniature marvels are energy-efficient, heat up faster than their larger cousins, and eliminate the guilt of food waste by cooking just what you'll eat. Many models even feature sophisticated delay timers that let you wake up to freshly cooked breakfast rice.
What truly excites me about these compact cookers is their surprising cooking versatility. Far from one-trick ponies, they transform into oatmeal stations, vegetable steamers, and can master everything from sticky sushi rice to hearty brown varieties.
Clean-up becomes a 30-second affair thanks to non-stick surfaces and dishwasher-safe components. Some premium models feature nano-ceramic coatings that not only clean effortlessly but also provide a healthier cooking surface—perfect for health-conscious individuals who still appreciate convenience.
Medium Rice Cookers (4-6 Cups) for Average Families
Step up from solo cooking, and you'll discover the sweet spot of rice cooker perfection: the versatile medium-sized rice cooker that balances capacity with practicality.
These 4-6 cup kitchen wizards deliver the ultimate cooking trifecta: generous portions, feature-rich operation, and reasonable counter footprint. With each batch yielding 8-12 cups of fluffy cooked rice, you'll satisfy the family dinner rush with enough leftover for tomorrow's lunch. Many premium models like those from Zojirushi feature sophisticated Neuro Fuzzy technology—essentially a rice-cooking AI that adapts cooking temperature and time for perfect results.
Feature
Benefit
Multiple Grain Settings
Perfect results whether cooking white, brown, or specialty grains
Delay Timer
Set in morning, return to fresh rice after work
Keep Warm Function
Maintains perfect serving temperature for hours
Non-stick Inner Pot
Effortless cleaning even after sticky rice varieties
What thrills me most about these midsize marvels are their intelligent cooking capabilities. Models like the Aroma Housewares ARC-994SB offer seven automated programs that transform them from simple rice cookers into versatile meal-making stations.
The non-stick cooking bowl means you'll spend less time scrubbing and more time enjoying your culinary creations. Unlike their larger counterparts, these perfectly-proportioned cookers won't waste energy preparing more rice than you need.
For the typical household of 3-5 people, this Goldilocks-approved size hits all the right notes—not too small, not too large, but just right.
Large Rice Cookers (8-10 Cups) for Extended Families
When I host my annual family reunion, there's one kitchen ally I can't live without: my large-capacity rice cooker. These 8-10 cup culinary powerhouses transform from everyday appliances into entertaining essentials at a moment's notice.
I've found these generous cookers indispensable for weekend meal prep and impromptu gatherings, effortlessly serving 10-20 hungry guests with a single batch. Beyond simple rice preparation, they're multitasking marvels with the ability to steam vegetables simultaneously—turning a side dish into a complete meal station.
The feature lineup in these larger models will impress even the most discerning home chef:
Multi-grain settings that master everything from delicate jasmine to hearty brown rice
Programmable timers ensuring fresh rice awaits regardless of your schedule
Extended keep-warm functions that maintain perfect serving temperature for hours
Automated cleaning cycles that simplify maintenance despite the larger size
Premium brands like CUCKOO and Zojirushi elevate the experience with commercial-grade construction featuring triple heating elements that eliminate undercooked spots and specialized non-stick coatings that last for years.
The efficiency of cooking in bulk cannot be overstated—why prepare rice daily when Sunday's batch can serve the family all week? The sophisticated temperature maintenance system ensures your rice tastes just-cooked whether served immediately or hours later. Advanced models like the CRP-P1009S feature smart grain detection technology that automatically optimizes cooking parameters based on the rice variety.
For larger households or dedicated meal preppers, these culinary workhorses deliver restaurant-quality results with minimal supervision—the ultimate kitchen efficiency upgrade.
Space Requirements and Storage Considerations
The romance with a gleaming new rice cooker can quickly fade when you discover it doesn't fit in your kitchen's ecosystem. Through trial and error, I've mastered the art of strategic rice cooker placement across kitchens of all sizes.
Before being seduced by maximum capacity, consider the spatial footprint of your potential new kitchen companion:
Cooker Size
Typical Dimensions
Ideal Kitchen Type
3-Cup Compact
8" × 8" × 6"
Studio apartments, tiny kitchens
5-6 Cup Medium
10" × 10" × 10"
Standard home kitchens
10-Cup Large
11" × 15" × 12"
Spacious kitchens, entertainment spaces
I've developed these practical storage solutions to maximize even the most challenged kitchen spaces:
Store uncooked rice in stackable airtight containers to maintain freshness and prevent unwanted visitors
Designate a dedicated appliance garage for your rice cooker if used daily
For occasional use, select a model with detachable cord and compact dimensions
Embrace vertical storage solutions—a shelf above the refrigerator can become prime rice cooker real estate
Consider wall-mounted shelving specifically sized for your rice cooker dimensions
Remember, the perfect rice cooker is one that integrates into your kitchen routine without creating workflow obstacles or storage headaches. Sometimes, the most premium compact model outperforms a larger budget option simply by virtue of actually being used!
Matching Rice Cooker Size to Cooking Habits
After testing dozens of models across countless meals, I've discovered the secret to rice cooker happiness: matching the appliance size to your unique culinary patterns.
Beyond sheer capacity, your cooking frequency and portion preferences should drive your decision. Let me share my field-tested sizing framework:
Your Cooking Pattern
Ideal Cooker Capacity
Perfect For
1-2 cups daily (1-2 people)
3-cup cooker
Singles, couples, small apartment dwellers
2-5 cups regularly (3-5 people)
5-6 cup cooker
Average families, meal preppers
5+ cups frequently (6+ people)
10-cup cooker
Large families, entertainers, batch cookers
Consider your weekly rhythm: do you prepare fresh rice daily, or cook large batches twice weekly? Do you regularly host weekend gatherings? Does your household prefer different rice varieties at the same meal?
I've found that slightly oversizing (choosing a 5-cup when you typically make 3) provides flexibility without significant drawbacks, while severely oversizing wastes energy and can actually produce poorer results when making small batches in a large cooker.
The wisdom of proper sizing extends beyond convenience—it directly impacts texture and taste. Rice cookers perform optimally when filled to 30-80% capacity, delivering that perfect fluffy consistency we all crave.
Energy Consumption Across Different Sizes
During my decade testing kitchen appliances, I've discovered that rice cooker efficiency isn't just about cooking—it's about optimizing your energy footprint and utility bills.
While larger cookers naturally consume more electricity, the relationship between size and energy use isn't always straightforward. I've analyzed dozens of models to compare their energy efficiency ratios and daily operating costs.
Here's my practical breakdown of what you can expect:
Cooker Size
Typical Wattage
Energy Per Cup
Best For
Small (3-cup)
300-500W
High for small batches
Daily small-batch cooking
Medium (5-6 cup)
600-900W
Moderate, good balance
Family meals, versatile use
Large (10-cup)
1000-1500W
Low for large batches
Batch cooking, entertaining
The secret energy user in most households is the "keep warm" function, which typically draws 30-45W continuously. While this seems minimal, it adds up when left running for days—a habit I've observed in many homes.
For maximum efficiency, match your cooker to your typical portion size. Contrary to intuition, smaller isn't always better. If you regularly cook for four but choose a tiny 3-cup model, you'll end up running multiple batches and potentially using more energy than a single cycle in a right-sized cooker.
Advanced models with induction heating technology often consume more power initially but cook faster and more efficiently, resulting in lower overall energy use—a classic case of spending energy to save energy.
Frequently Asked Questions
Can I Cook Other Grains Besides Rice in My Rice Cooker?
Absolutely! My rice cooker has become my grain laboratory over the years. Beyond perfect rice, I've mastered fluffy quinoa (using a 1:2 grain-to-water ratio), creamy morning oatmeal (1:2.5 ratio with a pinch of salt), and even hearty barley, millet, and buckwheat. The secret lies in adjusting your liquid ratios and selecting the appropriate cooking cycle. Many premium models even feature specific grain settings that take the guesswork out of preparation.
How Long Does a Typical Rice Cooker Last Before Needing Replacement?
In my experience testing hundreds of models, a quality rice cooker typically serves faithfully for 5-10 years with proper care. Budget models might give you 3-5 years, while premium Japanese and Korean brands often exceed a decade of daily use. The key to longevity? Gentle handling of the inner pot (avoid metal utensils), regular cleaning of the steam vent, and allowing the unit to cool completely before storage. I've found that cookers with removable lids generally outlast fixed-lid designs due to better cleaning access.
Are Stainless Steel Rice Cookers Better Than Non-Stick Ones?
After cooking thousands of batches in both types, I've developed a clear preference for stainless steel inner pots. While they require a slight learning curve (a light oil coating prevents sticking), they offer unmatched durability and eliminate concerns about coating degradation over time. Non-stick pots deliver convenience initially, but even premium coatings eventually wear, potentially introducing unwanted compounds into your food. For health-conscious cooks concerned about chemical exposure or those planning to keep their cooker for many years, stainless steel delivers superior long-term value despite the higher initial investment.
Can I Leave Cooked Rice in the Cooker Overnight?
While technically possible thanks to "keep warm" functions, I strongly advise against this practice. In my food safety testing, rice left at warm temperatures (140-170°F) for extended periods becomes a potential breeding ground for Bacillus cereus bacteria. Additionally, the extended warming drastically deteriorates texture, creating dry, crusty edges and sometimes developing off-flavors. For optimal safety and quality, refrigerate leftover rice within 2 hours of cooking (4 hours maximum), and enjoy the superior texture and flavor of properly stored and reheated rice.
Do More Expensive Rice Cookers Make Better-Tasting Rice?
This question sparked a month-long testing marathon in my kitchen! The answer is nuanced: premium models ($150+) consistently produce superior results with specialty and whole grain rice varieties thanks to precise temperature control and cooking algorithms. However, for everyday white rice, mid-range models ($50-100) often perform nearly identically to their expensive counterparts. The real value in premium cookers comes from versatility, durability, and special features rather than basic white rice quality. My recommendation? Match your investment to your rice variety preferences—jasmine and white rice lovers can save, while brown rice and specialty grain enthusiasts will appreciate premium technology.
Conclusion
After guiding countless home cooks through the rice cooker selection journey, I've learned that finding your perfect rice cooker size resembles discovering the ideal dance partner—when it's right, every movement feels effortless and natural. Through this comprehensive exploration of options, I'm confident you now possess the knowledge to select a cooker that aligns perfectly with your household dynamics, cooking patterns, and kitchen constraints.
Whether you embrace the compact efficiency of a 3-cup marvel, the versatile performance of a mid-sized model, or the entertaining prowess of a large-capacity unit, remember that the perfect rice cooker is the one that seamlessly integrates into your culinary lifestyle. With the right-sized companion in your kitchen arsenal, you're just one button press away from consistently perfect rice that will elevate every meal.
For more in-depth rice cooker wisdom and product recommendations, visit Rice Cooker Junkie, where passion for perfect rice meets practical kitchen advice.